Cocktail Installation to AWS on mac,linux
Amazon Web Services Cloud에 Cocktail를 설치하는 과정은 다음과 같다.
사전준비
설치 전 아래와 같은 프로그램들이 미리 설치 되어 있어야 하며 설치 되어 있지 않을 경우 에러 메시지가 발생한다.
1) 제공받은 cube 바이너리를 어느 디렉토리에서든 사용할 수 있도록 환경변수 path 설정을 한다.
2) Docker 다운로드 후 설치
https://store.docker.com/editions/community/docker-ce-desktop-windows
3) AWS 설치를 위해서는 Access Key와 Secret Key를 환경변수로 등록해야 한다.
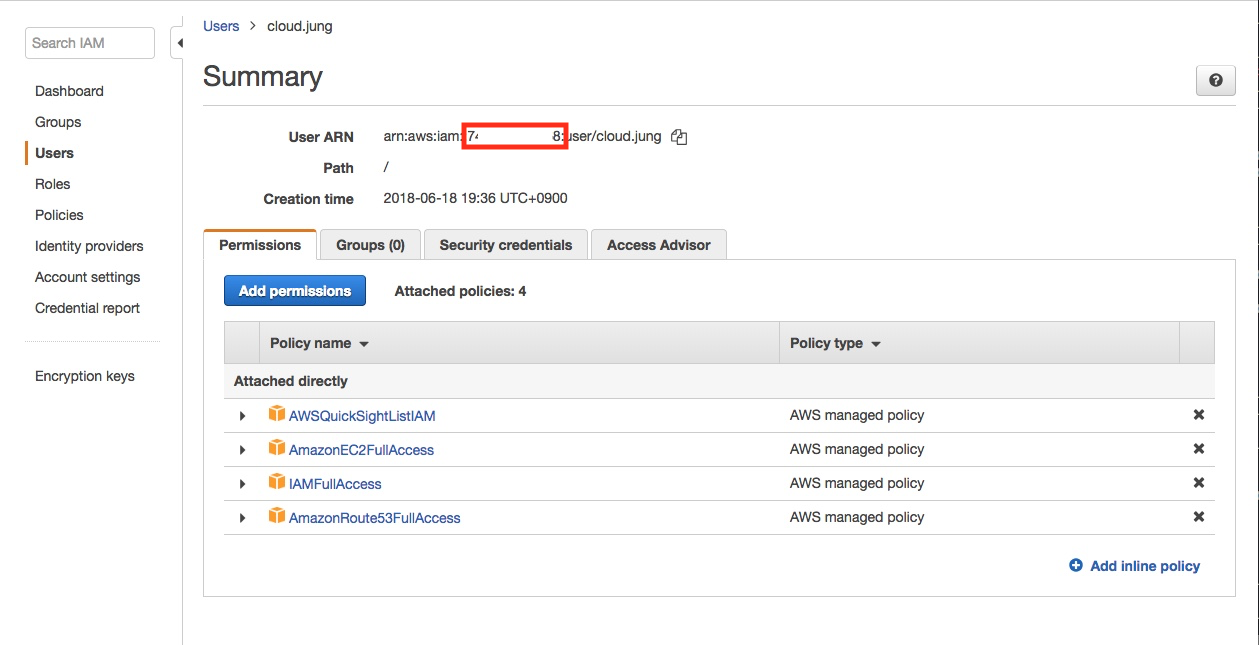
- Account id는 IAM > Users> Summary에서 User ARN에 포함된 문자열이다.
Access Key와 Secret Key를 발급받기 위해 AWS 서비스 콘솔에서 상단 우측 카테고리에서 'Security Credentials'를 클릭한다.

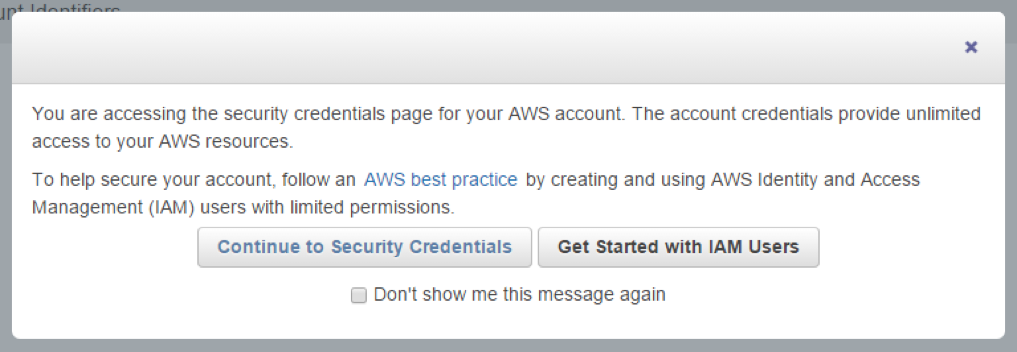
첫 화면에서 아래와 같은 경고창을 만나는데 IAM User를 생성할 것인지에 대한 내용이고, 여기서는 왼쪽 Continue to Security Credentials 버튼을 눌러 계속 진행한다.
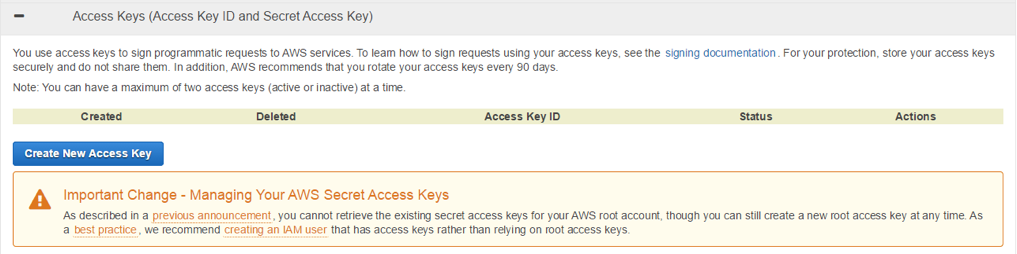
이후 화면에서 Access Keys(Access Key ID and Secret Access Key) 를 선택 후 Create New Access Key를 눌러 키를 발급 받는다.
키가 생성되면 아래와 같은 창을 볼 수 있고, show Access Key를 통해 Access Key와 Credit Key를 확인할 수 있다. 또한 Download Key File을 눌러 키를 저장할 수 있다.

아래와 같이 환경변수에 해당 값을 등록한다.
# export AWS_ACCOUNT_ID=xxxxxx
# export AWS_ACCESS_KEY_ID=yyyyyy
# export AWS_SECRET_ACCESS_KEY=zzzzzz
설치
1.먼저 설치를 위해 빈 디렉토리를 만든 후 해당 디렉토리로 이동한다
# mkdir /Desktop/aws
# cd /Desktop/aws
2.cube 명령을 이용하여 aws용 설치 script를 download 받고 초기화 한다.
# cube init -p aws
3.cube.yaml 파일을 열어서 설치하고자 하는 VM 정보를 기입한다. 아래는 master 1ea, worker 2ea 로 구성하는 예임.
---
cloud_provider: "aws"

# (optional) Instance size for the master node(s). Default: t2.medium.
master_vm_size: "t2.xlarge"

# (optional) Instance size for the worker node(s). Default: t2.medium.
worker_vm_size: "t2.medium"

# (required) The number of master nodes to be created. Example: 2
master_node_count: 1

# (required) The number of worker nodes to be created. Example: 3
worker_node_count: 2

# Just for reference.
# In order to retrieve regions and availability zone within the specific region use following commands
# aws configure
# aws ec2 describe-regions
# aws ec2 describe-availability-zones --region region-name
# region-code     region-name           Availability-Zone
# us-east-1         Virginia        us-east-1a, us-east-1b, us-east-1c, us-east-1d, us-east-1e, us-east-1f
# us-west-2         Oregon          us-west-2a, us-west-2b, us-west-2c
# us-west-1         N. California   us-west-1b, us-west-1c
# eu-west-1         Ireland         eu-west-1a, eu-west-1b, eu-west-1c
# eu-central-1      Frankfurt       eu-central-1a, eu-central-1b, eu-central-1c
# ap-southeast-1    Singapore       ap-southeast-1a, ap-southeast-1b
# ap-southeast-2    Sydney          ap-southeast-2a, ap-southeast-2b, ap-southeast-2c
# ap-northeast-1    Tokyo           ap-northeast-1a, ap-northeast-1c
# ap-northeast-2    Seoul           ap-northeast-2a, ap-northeast-2c
# sa-east-1         Sao Paulo       sa-east-1a, sa-east-1c
# ap-south-1        India (Mumbai)  ap-south-1a, ap-south-1b

# (required) The region code.
region: "us-west-2"

# (required) The Availability Zone. It must be belong to region
azone: "us-west-2a"

# (required) Absolute Path to an SSH private key file to access server.
private_key_path: "/path/to/ssh_private_key"

# (required) Absolute Path to an SSH public key file to be provisioned as the SSH key.
key_path: "/path/to/ssh_public_key"

# Kubernetes
k8s_version: "1.9.8"
cluster_name: "cube"
domain_name: "acornsoft.io"
addons:
  ingress: true
  monitoring: true
  logging: true

# (required) cocktail service
cocktail: true
상기 항목에서 private_key_path 와 key_path 는 서버에 ssh key로 접속하기 위한 private key와 public key의 경로를 기입한다. 이미 존재하는 경우에는 해당 경로를 기입하면 되고, 신규로 생성할 경우에는 아래 절차대로 실행하면 된다.
< ssh key 신규 발급 방법 >
# ssh-keygen -t rsa
Generating public/private rsa key pair.
Enter file in which to save the key (/Users/cloud/.ssh/id_rsa): /tmp/cubetest/id_rsa
Enter passphrase (empty for no passphrase):
Enter same passphrase again:
Your identification has been saved in /tmp/cubetest/id_rsa.
Your public key has been saved in /tmp/cubetest/id_rsa.pub.
The key fingerprint is:
SHA256:liTKyW/l3eU9+mBzyksL0AKpYXRsvsQ793nWJiUgJC0 [email protected]
The key's randomart image is:
+---[RSA 2048]----+
|     ....        |
|    . .E.o       |
|     o=o=        |
|   o.oo*.o..     |
|    =.. So... .  |
|     . B oo. + o |
|      o + o.o==o.|
|     .     o=+Bo.|
|            o*=. |
+----[SHA256]-----+
4.cube create 명령을 이용하여 실제 VM에 cocktail을 설치한다.
# cube create
5.오류없이 설치가 완료되면 master 장비에 ssh로 접속하여 cocktail-system를 구성하는 컨테이너가 정상적으로 기동하는지 확인한다.
# ssh -i ~/cube/pki/id_rsa root@{master1_ip}
# watch -n1 "kubectl get pods -n cocktail-system"
NAME                                     READY     STATUS    RESTARTS   AGE
apollomq-3231363346-77ltx                1/1       Running   0          2m
cocktail-api-67592375-63k43              1/1       Running   1          2m
cocktail-client-4046445963-rrwhh         2/2       Running   1          2m
cocktail-cmdb-520687312-rhm8s            1/1       Running   0          2m
cocktail-metering-aws-3487533297-tw1x7   1/1       Running   0          2m
redis-3766055555-1lzmh                   1/1       Running   0          2m
6.cocktail cloud 접속 url 확인.
해당 명령을 이용하여 cocktail 홈페이지 url과 port를 확인 할 수 있다.
# kubectl get service -n cocktail-system -o wide | grep cocktail-client-loadbalancer
삭제
더 이상 필요하지 않을 경우에는 아래 명령으로 삭제할 수 있다.
디폴트로 옵션을 주지 않는 경우에는 생성한 k8s cluster만 삭제하고 설치 스크립트는 그대로 유지하며, -f 옵션을 추가하면 생성된 aws infra를 삭제하고 cube.yaml 파일을 cube.yaml.org로 백업파일을 생성한 후 설치스크립트도 모두 삭제하게 된다.따라서, 이 명령어는 주의해서 실행해야 한다.
# cd /Desktop/cubetest

// k8s가 생성한 persistence volume과 loadbalancer를 먼저 삭제함.
// 삭제가 완료된 것을 aws console에서 확인해야 한다.
# cube destroy --pre-destroy

// k8s만 삭제하고 설치 스크립트는 그대로 유지
# cube destroy

// k8s와 설치 스크립트를 삭제하고 cube.yaml을 cube.yaml.org파일로 백업함.
# cube destroy -f
삭제한 후에 다시 설치하기 위해서는 cube init 명령을 통해 설치 스크립트를 다시 다운로드 받은 후 설치하면 된다.