Cocktail Installation to Azure on mac,linux
Azure cloudにCocktailをインストールする手順は、以下のとおりである.
事前準備
インストールする前に、以下のプログラムが予めインストールされていなければならない。インストールされていない場合は、エラーメッセージが発生する.
1) 提供されるcubeのバイナリをどのディレクトリでも使用できるように環境変数のpathを設定する.
2) Dockerダウンロード後、インストール
https://store.docker.com/editions/community/docker-ce-desktop-windows
3) 3) Azureのアカウントおよびapplicationと関連する値を下記のように照会し、メモしておく.
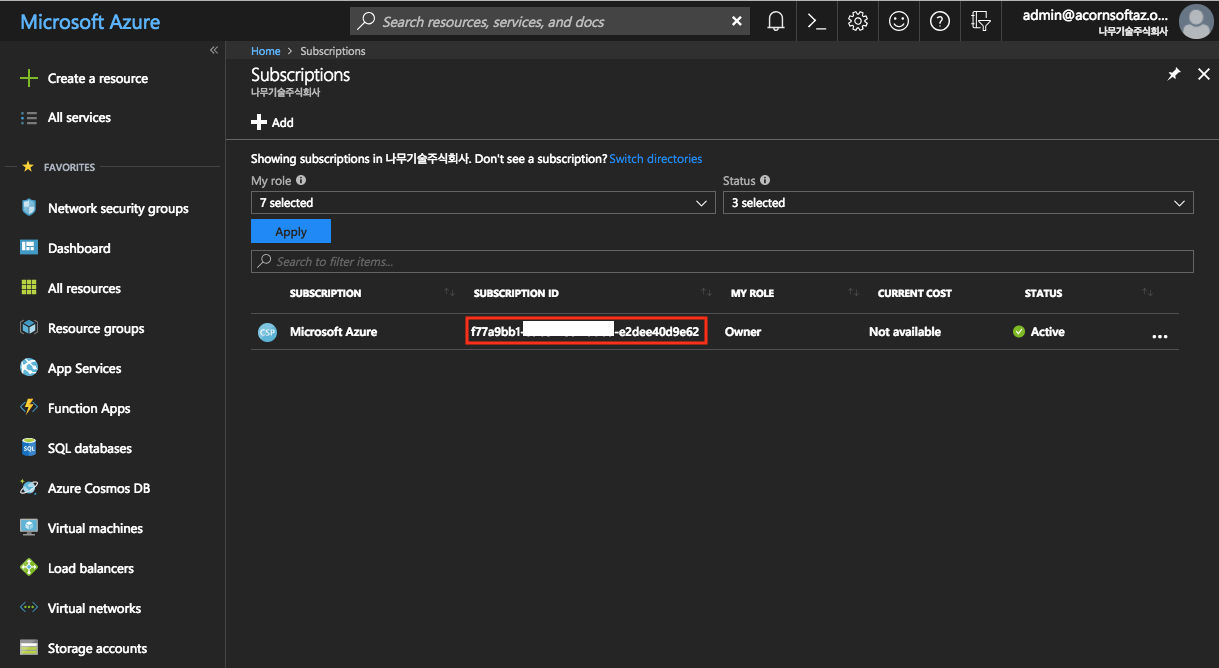
- Subscription_Id :Home> Subscriptions画面でsubscriptionlD値を確認
- TenantId : Home> Azure Active Directory> App registrations> Endpoints> OAUTH2.0 AUTHORIZATIONに含まれる値のうち、下記の例のようにxで表示された部分が TenantIdである)
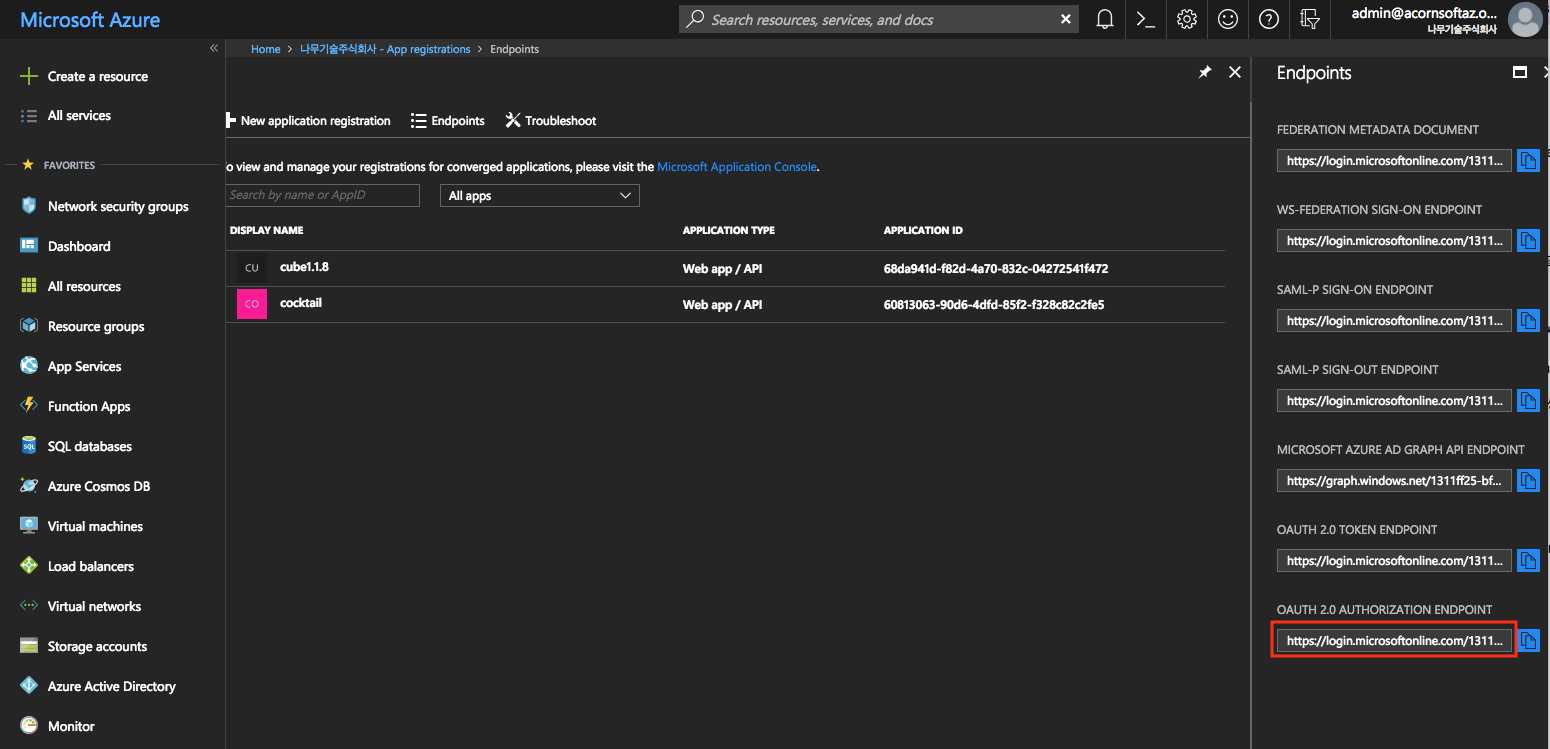
(EX : https://login.microsoftonline.com/xxxxxxxx-xxxx-xxxx-xxxx-xxxxxxxxxxxx/oauth2/authorize )
- Applicationld登録し、clientId値を求める
Home > Azure Active Directory > App registrations で +New application registration メニュー選択.
Application Typeを Web app/ APIと選択し、Sign-on URL(提供するサービス URL) 例。http://cocktail.acornsoft.ioと入力
Application Type을 Web app/API로 선택하고, Sign-on URL(제공하는 서비스 URL) 예.http://cocktail.acornsoft.io 로 입력
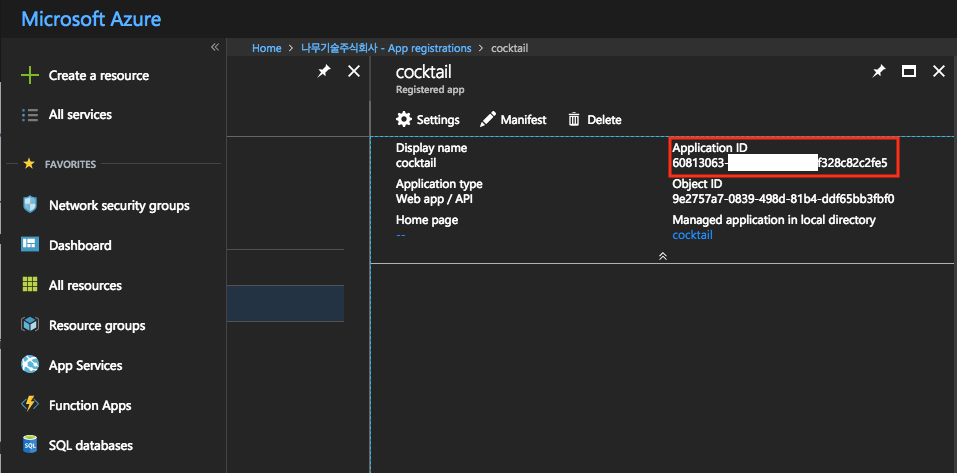
下の画面のように、登録されたapplicationの詳細画面でApplication IDがclientId値となる.
- client_secret 値を求める
Home> Azure Active Directory> App registrationsで登録したapplication名を選択し、上部のSettingsボタンをクリック
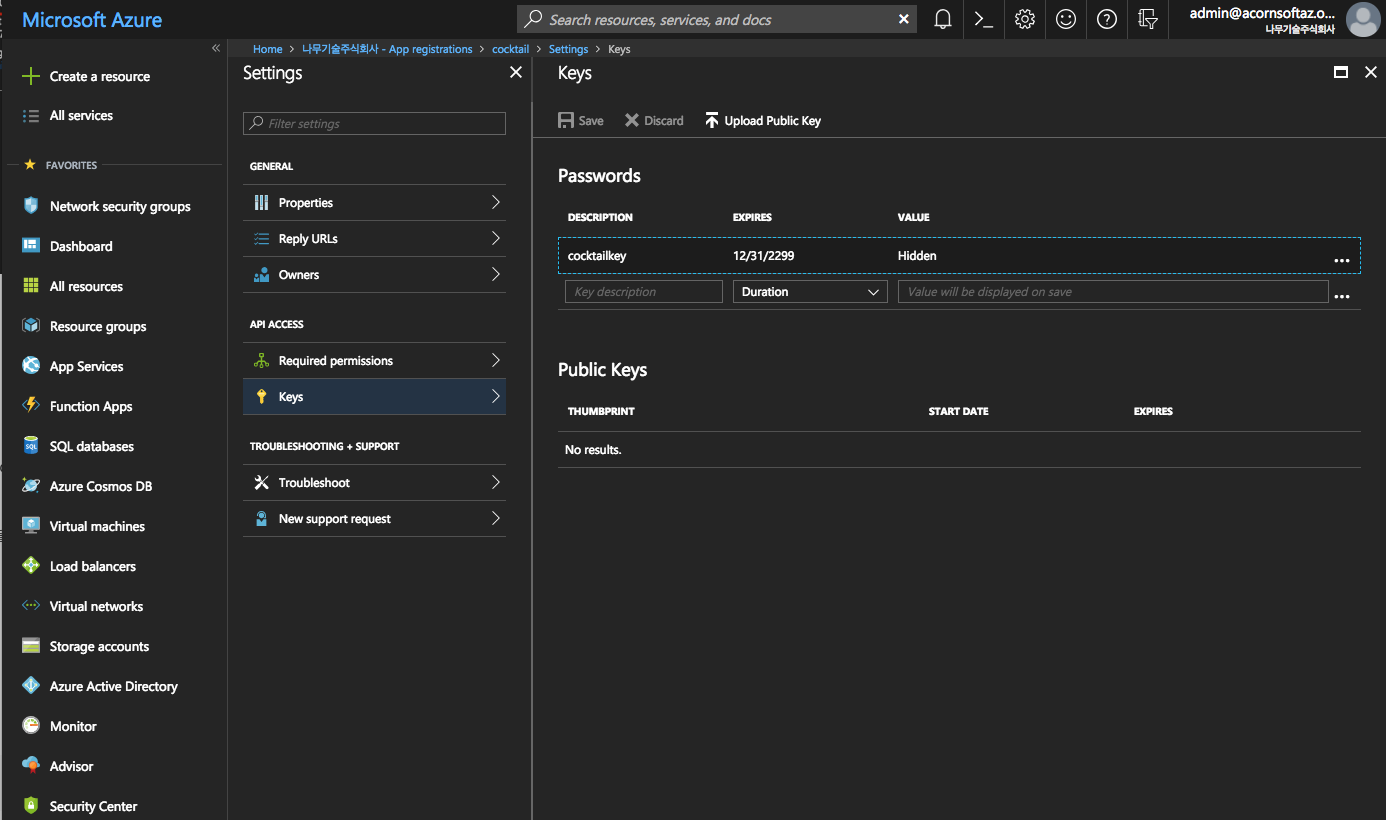
Keysメニューを選択し
description: cocktail_key
expires:never expiresを選択し、保存ボタンをクリックすると、自動的にvalue値が表示されるが、この値がclient_secret値となる.
- applicationでpermissionを設定
Home> Subscriptionメニュー選択>登録されたアカウント選択> Access Control(IAM)画面の上部で+ Addボタンをクリックㅤ
Role:Contributor 選択
Assign access to:Azure user, group, or application 選択
Select:登録したapplication名を入力
インストール
1.インストールするために、空のディレクトリを作成し、そのディレクトリに移動する.
  # mkdir /Desktop/azure
  # cd /Desktop/azure
2.cubeコマンドを使用して、azure用のインストールscriptをdownloadし、初期化する.
# cube init -p azure
3.cube.yamlファイルをエディタで開き、インストールするAzure情報およびインスタンス情報を書き込む.
---
cloud_provider: "azure"

# (required) The location string.
location: "koreacentral"

# (Required) It used as resource group name and prefix to all resources
# alphanumeric characters, periods, underscores, hyphens and parenthesis allowed
resource_prefix: "cube-v198-01"

# (optional) Instance size for the master node(s). Default: Standard_F2s.
master_vm_size: "Standard_F4s"

# (optional) Instance size for the worker node(s). Default: Standard_F2s.
worker_vm_size: "Standard_F2s"

# (required) The number of master nodes to be created. Example: 2
master_node_count: 1

# (required) The number of worker nodes to be created. Example: 3
worker_node_count: 1

# (required) Storage account type. Example: Standard_LRS
storage_account_type: "Standard_LRS"

# (required) ssh username to access server.
ssh_user_id: "cocktail"

# (required) Absolute Path to an SSH private key file to access server.
private_key_path: "/path/to/ssh_private_key"

# (required) Absolute Path to an SSH public key file to be provisioned as the SSH key.
key_path: "/path/to/ssh_public_key"

# Kubernetes
k8s_version: "1.9.8"
cluster_name: "cube"
domain_name: "acornsoft.io"
addons:
  ingress: true
  monitoring: true
  logging: true

# (required) cocktail service
cocktail: true
上記項目でprivate_key_pathと key_pathは、サーバーに ssh keyで接続するためのprivate keyとpublic keyのパスを書き込む。既に存在する場合には、当該パスを記入。新規に作成する場合は、以下の手順で実行する.
# ssh-keygen -t rsa
Generating public/private rsa key pair.
Enter file in which to save the key (/Users/cloud/.ssh/id_rsa): /tmp/cubetest/id_rsa
Enter passphrase (empty for no passphrase):
Enter same passphrase again:
Your identification has been saved in /tmp/cubetest/id_rsa.
Your public key has been saved in /tmp/cubetest/id_rsa.pub.
The key fingerprint is:
SHA256:liTKyW/l3eU9+mBzyksL0AKpYXRsvsQ793nWJiUgJC0 [email protected]
The key's randomart image is:
+---[RSA 2048]----+
|     ....        |
|    . .E.o       |
|     o=o=        |
|   o.oo*.o..     |
|    =.. So... .  |
|     . B oo. + o |
|      o + o.o==o.|
|     .     o=+Bo.|
|            o*=. |
+----[SHA256]-----+
4.cube create cube createコマンドを使用し、cocktailをインストールする.
# cube create
5.問題なくインストールが完了したら、master機器にsshで接続し、cocktail-systemを構成するコンテナが正常に起動するかを確認する.
# ssh -i ~/cube/pki/id_rsa root@{master1_ip}
# watch -n1 "kubectl get pods -n cocktail-system"ㅤ
6.cocktail cloudの接続urlを確認.
Master nodeに接続し、該当コマンドを利用して、cocktailホームページのurlとportを確認することができる.
# kubectl get service -n cocktail-system -o wide | grep cocktail-client-loadbalancer
Namespaceをcocktail-systemと選択し、Servicesメニューでcocktail-client-loadbalancerを選択する.
削除
不要になった場合は、次のコマンドで削除することができる.
デフォルトでオプションを与えない場合は、作成したk8s clusterのみ削除してインストールスクリプトはそのまま維持し、-fオプションを追加すると、cube.yamlファイルをcube.yaml.orgとしてバックアップファイルを作成した後、インストールスクリプトもすべて削除する.したがって、このコマンドは注意の上、実行しなければならない.
# cd /Desktop/cubetest

// k8sが作成したpersistence volumeとloadbalancerを先に削除する.
// 削除が完了したことをaws consoleで確認する必要がある.
# cube destroy --pre-destroy

// k8sのみ削除し、インストールスクリプトはそのまま維持
# cube destroy

// k8sとインストールスクリプトを削除し、cube.yamlをcube.yaml.orgファイルとしてバックアップ.
# cube destroy -f
削除した後に再インストールするためには、cube initコマンドでインストールスクリプトを再ダウンロードした後、インストールする.
Shooting Trouble
1.Dockerがインストールされていない場合
MinHoui-MacBook-Pro:cubetest minhona$ cube init -p minikube
Current Working directory : /Users/minhona/Desktop/cubetest
Checking pre-requisition [darwin]
exec: "docker": executable file not found in $PATH
docker is not found. please install docker before proceeding
Visit https://store.docker.com/editions/community/docker-ce-desktop-mac
ダウンロードリンクに移動し、Dockerインストール後、cubeを再実行する.
2.Quota数がオーバーした場合
Error: Error applying plan:

2 error(s) occurred:

* azurerm_virtual_machine.worker[0]: 1 error(s) occurred:

* azurerm_virtual_machine.worker.0: compute.VirtualMachinesClient#CreateOrUpdate: Failure responding to request: StatusCode=409 -- Original Error: autorest/azure: Service returned an error. Status=409 Code="OperationNotAllowed" Message="Operation results in exceeding quota limits of Core. Maximum allowed: 10, Current in use: 10, Additional requested: 2. Please read more about quota increase at http://aka.ms/corequotaincrease."
* azurerm_virtual_machine.worker[1]: 1 error(s) occurred:

* azurerm_virtual_machine.worker.1: compute.VirtualMachinesClient#CreateOrUpdate: Failure responding to request: StatusCode=409 -- Original Error: autorest/azure: Service returned an error. Status=409 Code="OperationNotAllowed" Message="Operation results in exceeding quota limits of Core. Maximum allowed: 10, Current in use: 10, Additional requested: 2. Please read more about quota increase at http://aka.ms/corequotaincrease."

Terraform does not automatically rollback in the face of errors.
Instead, your Terraform state file has been partially updated with
any resources that successfully completed. Please address the error
above and apply again to incrementally change your infrastructure.
https://docs.microsoft.com/en-us/azure/azure-supportability/resource-manager-core-quotas-request 公式リンクの方法に従ってquotaを増やした後、再実行する.