Cocktail Installation to AWS on mac,linux
Amazon Web Services CloudにCocktailをインストールする手順は、以下のとおりである.
事前準備
インストールする前に、以下のプログラムが予めインストールされていなければならない。インストールされていない場合は、エラーメッセージが発生する.
1) 提供されるcubeのバイナリをどのディレクトリでも使用できるよう、環境変数のpathを設定する.
2) Dockerダウンロード後、インストール
https://store.docker.com/editions/community/docker-ce-desktop-windows
3) AWSインストールのためには Access KeyとSecret Keyを環境変数として登録する必要がある.
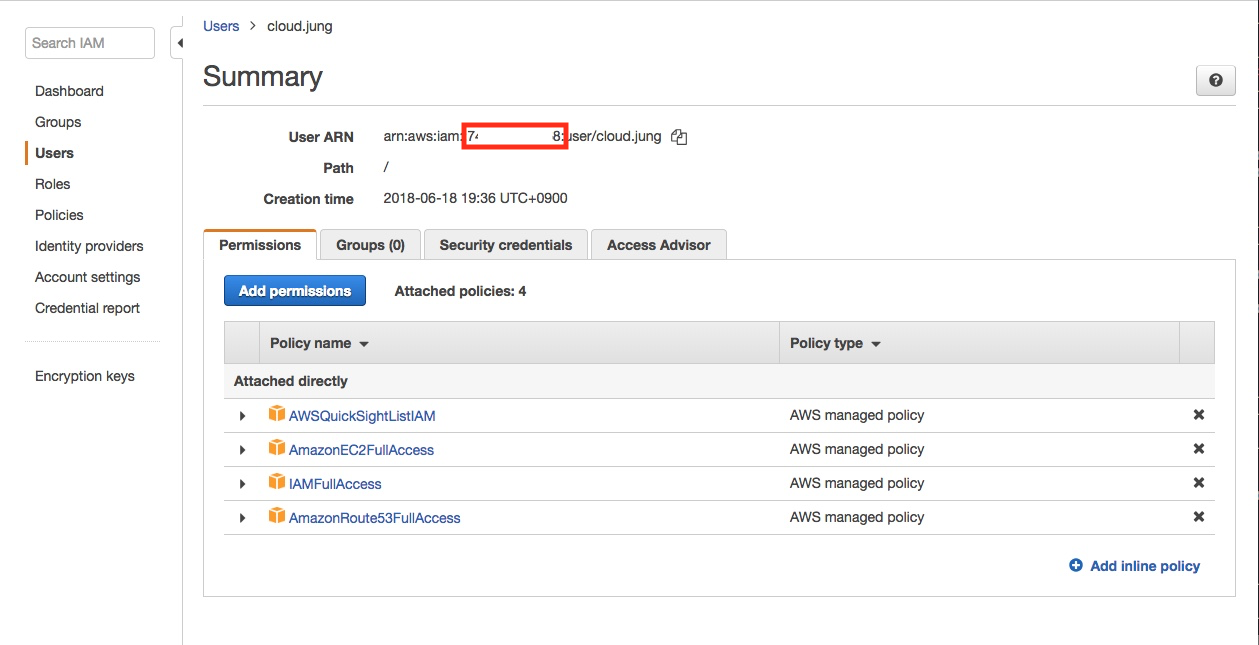
- Account idは、IAM> Users> SummaryでUser ARNに含まれている文字列である.
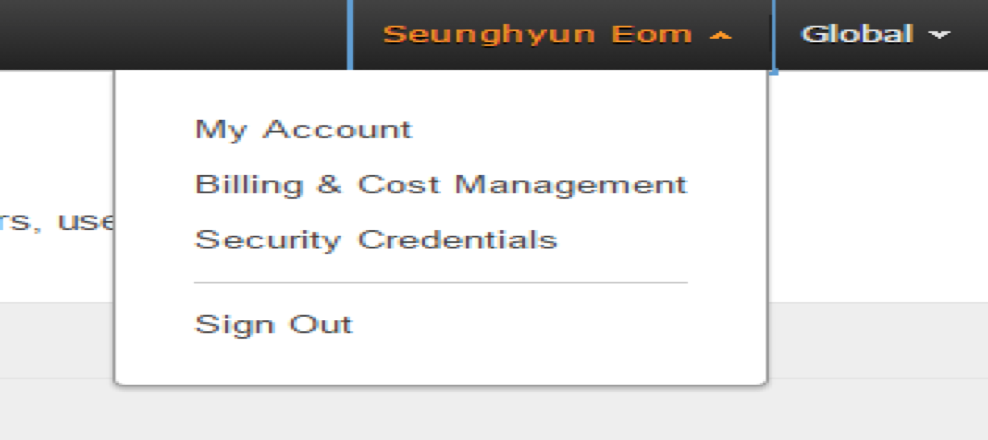
Access KeyとSecret Keyを発行するために、AWSのサービスコンソールの右上のカテゴリーで「Security Credentials」をクリック.
最初の画面で下記のような警告ウィンドウが表示されるが、IAM Userを作成するかについての内容であり、ここでは、左のContinue to Security Credentialsボタンをクリックして続行する.

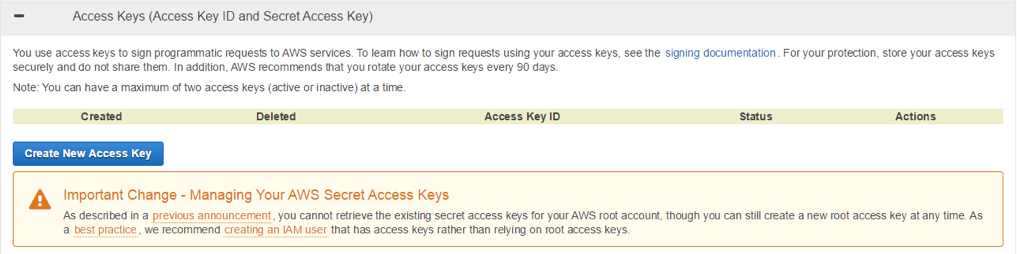
次の画面で、Access Keys(Access Key ID and Secret Access Key)を選択した後、Create New Access Keyを押してキーを発行する.
キーが作成されると、下記のようなウィンドウが表示され、show Access Keyで Access Keyと Credit Keyを確認することができる。また、Download Key File を押してキーを保存することができる.

下記のように環境変数に該当する値を登録する.
# export AWS_ACCOUNT_ID=xxxxxx
# export AWS_ACCESS_KEY_ID=yyyyyy
# export AWS_SECRET_ACCESS_KEY=zzzzzz
インストール
1.まずインストールするために、空のディレクトリを作成し、そのディレクトリに移動する.
# mkdir /Desktop/aws
# cd /Desktop/aws
2.cubeコマンドを使用して、aws用のインストールscriptをdownloadし、初期化する.
# cube init -p aws
3.cube.yamlファイルを開いてインストールするVMの情報を書き込む。下記は、master 1ea、worker 2eaで構成する一例である.
---
cloud_provider: "aws"

# (optional) Instance size for the master node(s). Default: t2.medium.
master_vm_size: "t2.medium"

# (optional) Instance size for the worker node(s). Default: t2.medium.
worker_vm_size: "t2.medium"

# (required) The number` of master nodes to be created. Example: 2
master_node_count: 1

# (required) The number of worker nodes to be created. Example: 3
worker_node_count: 1

# Just for reference.
# In order to retrieve regions and availability zone within the specific region use following commands
# aws configure
# aws ec2 describe-regions
# aws ec2 describe-availability-zones --region region-name
# region-code      region-name            Availability-Zone
# us-east-1            Virginia        us-east-1a, us-east-1b, us-east-1c, us-east-1d, us-east-1e, us-east-1f
# us-west-2            Oregon            us-west-2a, us-west-2b, us-west-2c
# us-west-1            N. California    us-west-1b, us-west-1c
# eu-west-1            Ireland         eu-west-1a, eu-west-1b, eu-west-1c
# eu-central-1        Frankfurt       eu-central-1a, eu-central-1b, eu-central-1c
# ap-southeast-1    Singapore       ap-southeast-1a, ap-southeast-1b
# ap-southeast-2    Sydney          ap-southeast-2a, ap-southeast-2b, ap-southeast-2c
# ap-northeast-1    Tokyo           ap-northeast-1a, ap-northeast-1c
# ap-northeast-2    Seoul            ap-northeast-2a, ap-northeast-2c
# sa-east-1            Sao Paulo       sa-east-1a, sa-east-1c
# ap-south-1        India (Mumbai)  ap-south-1a, ap-south-1b

# (required) The region code.
region: "ap-northeast-1"

# (required) The Availability Zone. It must be belong to region
azone: "ap-northeast-1c"

# (required) Absolute Path to an SSH private key file to access server.
private_key_path: "/Users/cloud/cert/acornsoft/id_rsa"

# (required) Absolute Path to an SSH public key file to be provisioned as the SSH key.
key_path: "/Users/cloud/cert/acornsoft/id_rsa.pub"

# Kubernetes
k8s_version: "1.9.8"
cluster_name: "cube"
domain_name: "acornsoft.io"
addons:
  cm: false
  km: false

# (required) Prometheus Rule Language - en, ko, jp
alertmsg_lang: ko

# (required) The unique cluster id.
cluster_id: cube-aws-2-5-2
上記項目でprivate_key_pathと key_pathは、サーバーに ssh keyで接続するためのprivate keyとpublic keyのパスを書き込む。既に存在する場合は、該当パスを書き込む。新規に作成する場合は、以下の手順で実行する.
# ssh-keygen -t rsa
Generating public/private rsa key pair.
Enter file in which to save the key (/Users/cloud/.ssh/id_rsa): /tmp/cubetest/id_rsa
Enter passphrase (empty for no passphrase):
Enter same passphrase again:
Your identification has been saved in /tmp/cubetest/id_rsa.
Your public key has been saved in /tmp/cubetest/id_rsa.pub.
The key fingerprint is:
SHA256:liTKyW/l3eU9+mBzyksL0AKpYXRsvsQ793nWJiUgJC0 [email protected]
The key's randomart image is:
+---[RSA 2048]----+
|     ....        |
|    . .E.o       |
|     o=o=        |
|   o.oo*.o..     |
|    =.. So... .  |
|     . B oo. + o |
|      o + o.o==o.|
|     .     o=+Bo.|
|            o*=. |
+----[SHA256]-----+
4.cube create cube createコマンドを使用し、実際にVMにcocktailをインストールする.
# cube create
5.エラーなしでインストールが完了したら、masterデバイスにsshで接続してcocktail-systemを構成するコンテナが正常に起動することを確認する.
# ssh -i ~/cube/pki/id_rsa root@{master1_ip}
# watch -n1 "kubectl get pods -n cocktail-system"
NAME                                     READY     STATUS    RESTARTS   AGE
apollomq-3231363346-77ltx                1/1       Running   0          2m
cocktail-api-67592375-63k43              1/1       Running   1          2m
cocktail-client-4046445963-rrwhh         2/2       Running   1          2m
cocktail-cmdb-520687312-rhm8s            1/1       Running   0          2m
cocktail-metering-aws-3487533297-tw1x7   1/1       Running   0          2m
redis-3766055555-1lzmh                   1/1       Running   0          2m
6.cocktail cloudの接続urlを確認.
該当コマンドを使用して、cocktailホームページurとportを確認することができる.
# http://lb:8080
削除
不要になった場合は、次のコマンドで削除することができる.
デフォルトでオプションを与えない場合は、作成したk8s clusterのみ削除してインストールスクリプトはそのまま維持し、-fオプションを追加すると、作成されたVMを削除し、cube.yamlファイルをcube.yaml.orgとしてアップファイルを作成した後、インストールスクリプトもすべて削除する.したがって、このコマンドは、注意の上、実行しなければならない.
# cd /Desktop/cubetest

// k8sが作成したpersistence volumeとloadbalancerを先に削除する.
// 削除が完了したことをaws consoleで確認する必要がある.
# cube destroy --pre-destroy

// k8sのみ削除し、インストールスクリプトはそのまま維持
# cube destroy

// k8sとインストールスクリプトを削除し、cube.yamlをcube.yaml.orgファイルとしてバックアップ.
# cube destroy -f
削除した後に再インストールするためには、cube initコマンドでインストールスクリプトを再ダウンロードした後、インストールする.